
Implement A/B testing on modern frontend frameworks such as React or Angular, via the Activation API
Context
Modern JavaScript client-side frameworks (React, Angular, Vue...) manage the DOM tree and elements themselves (and often implement a virtual DOM on their side). This makes it very difficult to implement client-side tests outside of the framework being used, since any kind of DOM manipulation will usually conflict with the internal DOM management provided by the framework. Typically, if you modify elements or add logic from the outside, those changes will be erased / overwritten later.
These problems can be worked around in most cases, for instance by using DOM Mutation Observers, but your outside code needs to be extremely careful. This can quickly become very tedious and counter productive. Rather than being intrusive from the outside, it can be much easier to implement the variations directly in your usual React / Angular / Vue codebase, and trigger the experiments programmatically. The logic used is almost the same than for our server-side based SDKs - in practice, Kameleoon frontend engine acts here as the equivalent of a JavaScript SDK.
Installation of the Activation API
To use the Activation API methods presented here, you just need to install Kameleoon in your client-side application as usual. The installation process is the same as for a standard website, even if you're using a web-application (sometimes called a SPA): you just add an external JavaScript application file, which contains our Kameleoon engine and the Activation API.
You can load the Kameleoon application file in several different ways, directly in the HTML source code or via your application JS code. In any case, we recommend making sure that Kameleoon is fully loaded before running any application code that will trigger experiments. You should listen to the Kameleoon::Started event for this purpose. Another alternative (not the best approach in our opinion) is to load the Kameleoon script synchronously in your HTML loader page, before your framework code.
Creation and configuration of the experiment
The creation and configuration of the experiment is done as usual in the Kameleoon back-office. All steps are similar to a standard experiment (creation of variations, choice of goals and analytics integration, etc). The only thing worth noting is that you should choose a targeting condition that will actually never triggers (for instance, an URL condition with https://thisdomaindoesnotexist.hello.com), since you will trigger the experiment manually using the API, and you never want the experiment triggered by mistake by the "natural" targeting engine of Kameleoon.
You will also need to note down the IDs of the experiment and of the variation to use them in your code.
Sample Code to trigger an experiment
    var variationID;
    var experiment = Kameleoon.API.Experiments.getById(75253); // Make sure Kameleoon is loaded and active at this point

    if (! experiment) // The experiment is not currently live (not launched yet, or paused). The default behavior should take place
    {
        variationID = 0;
    }
    else
    {
       Kameleoon.API.Experiments.trigger(experiment.id, false);

        if (! experiment.associatedVariation) // The experiment is not activated, which usually means the user has not been assigned a variation (part of the traffic was not assigned to any variation), or capping requirements are not met. Again, the default behavior should happen
        {
            variationID = 0;
        }
        else
        {
            variationID = experiment.associatedVariation.id;
            var additionalParameters = Kameleoon.API.Variations.execute(variationID); // Illustration of the JSON parameterization technique - the additionalParameters variable will now be equal to the JSON content we set in Kameleoon's back-office
        }
    }

    // The following code implements the changes related to the experiment

    if (0 == variationID) {
        // This is the default / reference number of products to display
        recommendedProductsNumber = 5;
    }
    else if (148382 == variationID) {
        // We are changing number of recommended products for this variation to 10
        recommendedProductsNumber = 10;
    }
    else if (187791 == variationID) {
        // We are changing number of recommended products for this variation to 8
        recommendedProductsNumber = 8;
    }
The code sample on the right should explain clearly how to use our API to trigger an experiment and obtain the associated variation for the current user. Note that while the experiment is not launched via the Kameleoon interface, Kameleoon.API.Experiments.getAll() won't include it in the array of live experiments. This allows you to prepare your code deployment (containing the test implementation) and launch your experiment independently. Typically, the deployment will be planned by the IT team and the actual experiment launch will be sheduled by a product owner or a member of the marketing team. This can also be used for feature flagging, for instance.
Note that to retrieve variation dependent JSON data in your application code, the content of the JS variation code entered in the Kameleoon interface should be something like:
return {timeout: 500, errorMessage: "Something went wrong", productIDs: [536, 892]};
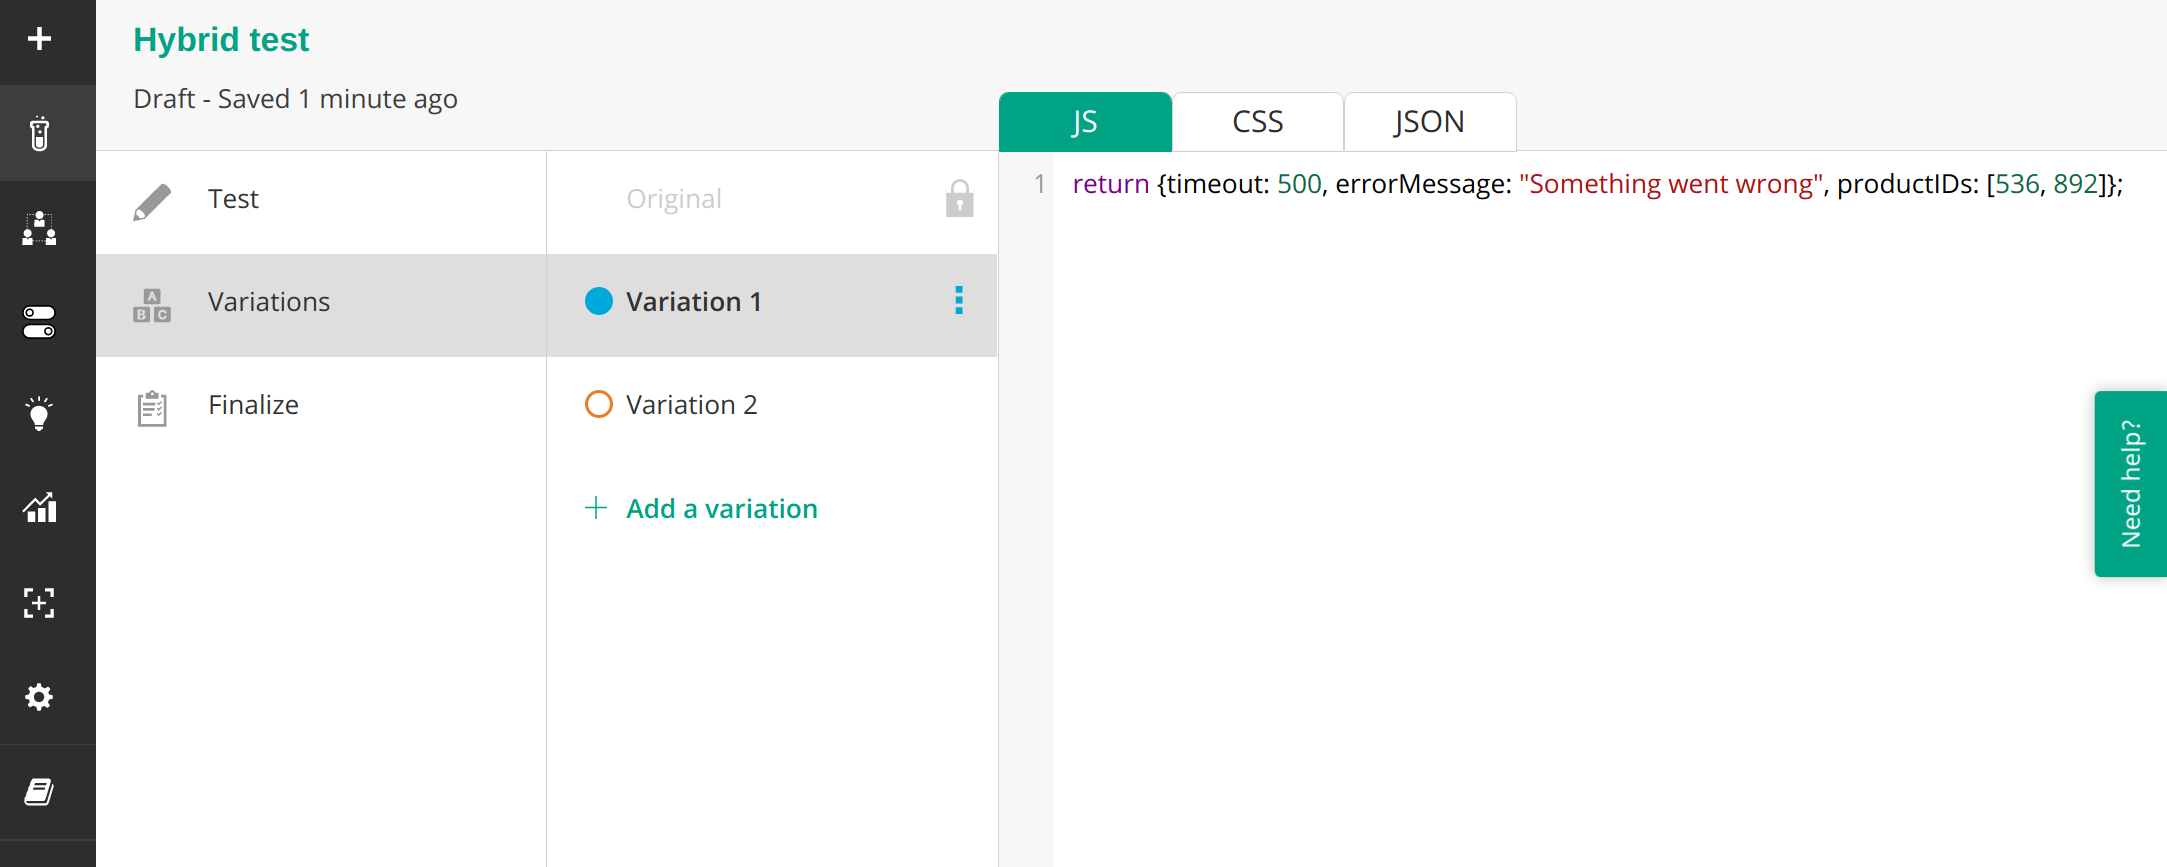
So you need a return statement before your JSON object. Also make sure you enter this code in the JS tab, not the JSON one. The JSON one is used to add server-side JSON parameters. The JSON tab will be present if you created a hybrid experiment; in the case of a standard front-end only test, it will not be displayed.